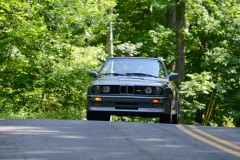
Posts by: bmwe30m3cabrio@aol.com
import
Importation/Federalization Page
(a simplified
10 step how to guide…)
Step 1 –
Commit yourself totally to spending a lot of time and money, make sure
you want this car.
The MINIMUM
amount of money required to import and federalize a European car is approximately
$10,000. (There are exceptions for race cars and display cars, but
I’m assuming you want to drive this thing more than 2500 miles per year,
and that more than 500 of it were manufactured) Shipping and duty
will eat up about $3K, and federalization will cover the other $7K even
if the car already has catalytic converters. If you need an airbag
added for instance, it will cost you another $4K for parts alone!
You must prepare yourself financially and mentally for the MONTHS ahead.
No bank is going to loan you money to do this. Check with an ICI/RI
to make sure the car you want is eligible for importation, and that they
are willing to import/federalize the car for you. Do this before
you even start looking for a car to buy… I did. My personal
wholehearted recommendation for an ICI/RI is JK Technologies in Baltimore,
MD. Very nice folks who do impeccable work.
NHTSA
import info page w/list of Registered Importers.
Step 2 –
Find a car, preferably one with low miles. Year of manufacture is
CRITICAL. Here’s why…
If the car
is older than 25 years, no federalization required (woohoo).
If the
car was built before Sept 1989 and has catalytic converters, no airbag
or passive restraint required (only $7K to federalize).
If the
car is older than 1996, no OBD2 retrofit required (a very expensive road…).
Unless
the car has less than 50K miles on it, get ready to buy new catalytic converters…
Mine was
an ’89 with 48K miles and catalytic converters already installed.
The
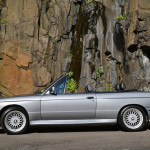
place I found my car. (Yes that’s my car in the showroom picture!!)
A
British used car seller with E30 M3 Sport EVOs and cabrios.
Step 3 –
See the car or have it inspected.
Just like
any other car purchase, but that much more important because of the $$$.
Make sure you are not buying a lemon. E30 M3s are expensive to maintain,
get a cherry example and save yourself worlds of grief. Remember
though, a few thousand dollars of airfare and hotel can pay for just about
anything on an M3 except for the motor. I had mine sent to a BMW
shop locally in Switzerland for mechanical inspection in lieu of travelling
over myself. I am not an expert, and the trip would have cost $3K.
Instead I paid them $1K to inspect the car from top to bottom, tune it
up and fix small items. Right now the dollar buys a lot in Europe.
Step 4 –
Buy the car.
Most folks
will want wire transfers to their banks. Your bank will not necessarily
give you a good rate, shop around. If you watch the currency exchange
rates, you can save your self a few thousand dollars here too. I
managed to hit a 4 month low swing of the Swiss Franc in my favor!
Make sure that you get a bill of sale and a foreign title. Without
these documents, you are not going to be able to import or register the
car.
Step 5 –
Arrange shipping.
Your ICI/RI
can recommend a good shipper. My shipper handled all of the details,
even transporting the car from Zurich to Bremerhaven where it was loaded
on the boat. They will have you fill out PILES of paperwork for customs
etc. Import duty is 2.5% of purchase price. Shipping to the
west coast will cost more than $3K.
Step 6 –
Clear customs/Start Federalization.
A good shipper
will have your car out of customs in a week or so. Mine was out in
1 DAY! You may have to close the loop between ICI/RI and your shipper
to ensure a smooth handoff. BY LAW, you CANNOT transport the car
or perform any of the federalization work yourself. The car does
not even legally belong to you (even though you paid for it) until DOT
and EPA release the posted bonds on the car. Most ICI/RIs require
50% of the total fee up front before work starts. If your car is
not able to be brought into compliance , you must export it or abandon
it to the government for destruction. Pay your shipper now too.
Step 7 –
DOT federalization.
Your federalizer
will add/change the car as follows:
Install
US headlights/blinkers/marker lights/third brakelight
Install
US gauge cluster (ODO should read miles or DMV will lose their mind!)
Install
Door bars
Install
O2 sensor, catalytic converter, DME to use them – where applicable ($)
Install
airbag system – where applicable ($$)
Convert
car to OBD2 – (you’re dreaming $$$$$)
Depending
on the ICI/RI (be nice to them) they may let you supply used US spec parts
for some of the conversion.
Step 8 –
EPA emissions test.
Your ICI/RI
will have the car tested to ensure that it meets EPA emissions standards.
Don’t think this is just another tailpipe test. This is a FEDERAL
emissions test to STRICTER standards than any state test including CA.
Each retest costs $1.5K, so be sure your car is tuned up and your cats
are in good shape, because they can charge you for the retests and the
parts/labor necessary to make your car pass. They may even refuse
to import your car if it is a gross polluter that will cost too much to
bring into compliance (old ragged out Ferraris from Liberia etc..<grin>)
Have your car tuned up before it leaves Europe.
Step 9 –
Wait
Your federalizer
will
have to submit a detailed report with pictures of all mods performed to
DOT. Even after he has taken the time to generate and submit the
report, DOT will put a 30 day MANDATORY hold on your car. Once your
car has passed the EPA emissions test, EPA puts a 15 day MANDATORY hold
on your car.
Step 10
– Register the car
Pay your
federalizer now. Get temp tags so you can drive the car to get it
state inspected. Be prepared for the blank stares from the folks
at DMV when you walk in and try and register/get title for an imported
car. Have all of your paperwork in order, and ask to speak to the
supervisor.
CONGRATULATIONS,
IT HAS BEEN 6 MONTHS AND YOU FINALLY HAVE YOUR CAR….
Was it worth
it? YES. Would I do it again? I honestly don’t know,
it was a ROYAL pain even though everything went smoothly. The possibility
for nightmarish increases in cost/paperwork is there at every turn.
I didn’t sleep a whole lot for that 6 months.
To really
give credit where credit is due, Jim Baxter of Victoria, B.C. found the
car originally. He not only steered me to it, but had a friend of
his in Switzerland act on my behalf to help smooth the road. He didn’t
buy mine, because he found one of his own with 2,500 original miles on
it!! He is still working on importing his to Canada (tougher than
importing to the US!!)
Links and Contacts

Here are some useful links I gathered while doing my research.
If you want to contact me please email me at: james@bmwe30m3cabrio.com
Importation information:
The general step by step guide to how to import a car from Europe by Phil Cataldi
Basic government guidelines in order to import a vehicle from Wallace Labs in Houston, TX
Details of frequently asked questions from the EPA
A couple of people who will import the car for you in Canada
Places to search for a car from Europe:
All of Europe search engine: Mobile.de
A United Kingdom search engine: Autotrader.co.uk
A German Search engine: German classifieds
BMW Car Magazine (UK magazine) Classifieds
General e30 M3 information:
Magazine Articles about my M3 Cabrio:
Technical:
The Inspection

The pre purchase inspection was done by my friend Jake Larsen. He went over the car and graded all major items on a scale from 1-10. Below you will read his report and will find I could not be happier with what he found. He scored 53 separate items with everything coming together at an average of 9.15. Well on to the report:


1. Underbody
Rear under body: 10
Mid under body: 10
Forward under body: 10
Overall, impressive. Both sides of the under body in the mid section ( where the side skirts attach ) had been re-undercoated. Bob also mentioned the side sills had been filled with Waxoil which is a big bonus when it comes to corrosion prevention.
2. Under body components
Gas tank: 10
Exhaust: 9
Forward cat heat shield just beginning to crack on the forward edge. This is nothing to worry about. It was very minor. A picture was taken.
Exhaust header: 7
The lower cross over pipe has a one inch crack at one of the welds. It won’t effect anything and does not create any exhaust leak noise. Mine was cracked much worse and I never noticed it. I wouldn’t worry about it too much. A picture was taken.
Front sub frame: 10
I looked specifically for cracked motor mounts as well as general condition. No cracks. Also worth noting was the fact that this sub frame is the factory reinforced version. Bonus! A picture was taken.
Underside of engine: 9
Very minor wetness. Just enough for dust to stick to. Hardly anything really. You just couldn’t eat off it, hence 1 point loss. 😎
Steering rack and tie rods: 10
Boots are crack free as well as the dust boots on the tie rod ball joints. No leaks, no bearing play.
Firewall sound proofing: 10
3. Suspension components
Rear sub-frame and trailing arms: 10
No cracks in any of the rubber bushings
Rear sway bar and links: 9
LH sway bar link has a little plastic clip mounted on it that is supposed to hold the rear hand brake cable. It had cracked but the hand brake cable was zip tied to it. No biggy. Rubber bushings had no cracks. A picture was taken.
Front sway bar and links: 10
No cracks in either sway bar bushings or end link ball joint dust boots.
Front control arms: 10
Ball joint dust boots were perfect, no bearing play. The solid control arm offset bushings were installed and looked perfect as well.
Front strut top mounts: 10
I was unable to look at the rear shock mounts. I felt no clunking while test driving and assume them to be good as well.
Overall, all suspension components were perfect. While driving, damping felt excellent and very “tight” like new.
4. Drive-train
Differential: 10
No leaks
Half shafts: 9
The RH inner and outer boots had been replaced. However, zip ties were used to affix the boot on the inner side. This is not factory. He did try to reuse the factory bands on the outside boot, but they shouldn’t be used. This isn’t a biggy at all, but you should know. I think he should’ve had his dealer put the proper factory bands on. Other than that, the installation looked fine. I only took 1 pt. off since they are new boots even though they are not installed in true factory form. A picture was taken.
Drive shaft: 10
Gear box: 8
It looked like the selector rod input shaft seal had a very slight leak. It was minor, but did give the rear of the gearbox a thin oil coating. A picture was taken.
Shifter linkage: 7
The shifter ball and selector rod link did have some play which let it wiggle around a bit while driving. Not just they typical “M3 shifter buzz”. It wasn’t excessive however, I’d renew the links and bushings.
5. Brakes
Front brakes: 7
Normal pad / disc wear but it’s getting close for replacement. The next pad change will require new discs.
Rear brakes: 7
Same as above
6. Engine and engine compartment
Valve cover: 9
The paint had come off in one spot. Actually very minor and it was in an inconspicuous area. It was a strip between 2 of the valve cover “ribs” measuring about 2 inches in length. A picture was taken.
Intake plenum chamber: 10
Throttle bodies: 9
They looked good, but weren’t quite bare aluminum new. They needed a light cleaning. The yellow “tamper proof” caps on theindividual mixture screws were still there. Cool.
Belts: 9
Normal wear
Pulleys: 7
The power steering and crank pulley had some corrosion. Merely cosmetic.
Cylinder head: 10
I did not pull the valve cover. When looking at the skimming depth indicator on the bottom of the head (on the sealing surface exposed from underneath) it was obvious the head had never been removed. The oil cap and all that I could see inside the valve cover had absolutely no carbon build-up. It did have some slight brown layer on everything inside. This is caused by the use of Castrol oil. It doesn’t cause any problems and never builds up, but it does cause this odd brown coating to appear on everything inside. Bob did not seem excited for me to pull the valve cover and from I did see I was comfortable there weren’t going to be any surprises. So I decided it wasn’t necessary.
All hoses: 10
All vacuum leak possibilities: 10
Everything was tight
All wiring: 10
In absolute perfect condition. Never seen one with no wire repairs!
Air flow meter: 10
Never been opened
Radiator: 9
Not exactly “as new”. Still is very good condition.
Air-box mount: 10
These can crack
Power steering components: 9
I took one point off just because everything wasn’t completely dry. No biggy.
Fuse box: 10
Hood liner: 10
Oil cooler: 9
Not exactly “new”, but in very good condition. Just a few bent vanes.
Aux fan: 9
One point for having sliver over spray on it.
The oil filter was proper BMW.
A sticker was present showing the A/C had been converted to R134
There is a drain for the cavity just forward and below the windshield. It’s part of the firewall. It’s common for it to plug up and not allow drainage. It was obstruction free.
My Story

 I have been a car enthusiast my whole life, loving cars of all shapes and sizes, models and makes. However it was when I was in college that I found the car that I would eventually have to have. It was a BMW E30 M3. At the time three guys on campus were lucky enough to be owners of them (though one would argue that the Burlington VT, weather was not the right climate for care of such a creature) I was driving a 1989 1.8-liter GTI 16V, and was only left to admire the M3 from afar.
After college and a year in China, I came home to start my career and to save money for my then dream car. I was targeting the 1991 BMW M3 in Silver, no small feat in 1992 with limited numbers available on the market and labor intensive search means at best (the internet was not available at that time). But to my surprise I found one after 2 months of searching along the east coast, only about 15 miles from my home at Prestige BMW. It was a 1991 Sterling Silver BMW M3 with 7,000 miles on the clock. Although I would’ve preferred a gray interior to it’s black, it was the car I had hoped for and nearly perfect with the exception of some small paint imperfections on the rear spoiler.
I enjoyed that car for seven years and 33,000 until I decided to give it up as it became increasingly difficult to keep it while I was about to move overseas to work for an undetermined period of time. The car had traveled with me from NJ to Arizona and ultimately back east to Florida, where it was sold sight unseen (with the exception of some digital pictures and a local pre-purchase inspection) via Roundel’s advertisement section.
The current owner, Luis Martinez, is still enjoying the car in Northern California. Luis mainly uses it on weekends and driving schools. I’m told the motor is currently being converted to a 2.5 liter from the original 2.3 liter after blowing the motor recently at a driving event.
The Persuit
After moving overseas (to Singapore), I decided that no time should be wasted saving and searching for my next vehicle the E30 BMW M3 Cabriolet. I first came across the Cabriolet in 1992 chatting with my good friend Mike Gallino. Mike and I met (he’s a fellow BMW enthusiast) via our mutual appreciation for each others cars. Mike’s cars – Both the M3 and the M-Technic convertible were Brilliant Red. He shared with me a copy of an official European M brochure within which was a picture of the Cabriolet.

In 1998 while internet searching was improving there were still not many sites available to do a proper search.
So I relied heavily on BMW Car magazine classifieds and would follow up on leads accordingly from there. Through those ads I came across Munich Legends and Independent Motors both of which are specialized BMW resellers in the UK.
In January 2000 while visiting friends in the UK I made a visit to Munich Legends. Unfortunately they did not have any Cabrio’s there at the time, but as luck would have it a customer was visiting with his Sterling Silver M3 Cabrio! That surely wetted my appetite and my pursuit grew stronger. Even just seeing the car made the whole trip worthwhile.
I returned to the States (Arizona) in May of 2000 and was able to continue my search much more effectively. Through the various resources I learned that there was in fact one cabrio in the U.S. imported by Phil Cataldi. I began to email Phil, who graciously informed me of what was involved so that I would be prepared once I found the car. Phil’s information also helped me narrow my search by sharing with me that cars younger than 1989 would have to have air bags installed to meet U.S. standards. I chose to search for an ’89. Having said that my database of 50 plus E30 M3 Cabrio’s would need to be refined, and would now include cars built in the 1989 timeframe, preferably Silver, with air conditioning and a catalytic converter (like finding a needle in a haystack). If my research was accurate (based on production numbers) there were 88 cars built in that timeframe with Catalytic converters.
Needless to say my searching would last for months and months (and even more months) with no luck. I gave in a little and started looking at different color options, but would not give in on the AC (a requirement in the desert heat), but not very common in European cars but my luck was about to change.
Choices, which one to buy?


In the summer of 2001 while traveling to Spain for friends wedding I was able to build in a stopover in the UK for another visit to Munich Legends(ML) and Independent to see the current stock. This time I did see and drive a 1989 E30 M3 Cabrio with a dogleg gearbox being sold on consignment at ML. In all respects it was nearly perfect; 30,000 KM (about 19,000 miles) and red with half leather interior with the Ravagolia cloth – virtually identical to Phil Cataldi’s car. It was beautiful with a full service history and its history was even documented by BMW CAR magazine. The only item missing was the AC.
I was tempted to say the least where it not for yet another one on the market at the same time. It was a Macao Blue 1989 E30 M3 Cabriolet with only 4,600 miles on it. This car was fully loaded; it had a Wiseman Hardtop, 16 x 7.5 OEM rims , AIR CONDITIONING, as well as all the standard features. The biggest area of uncertainty with this car was that it was several hundred miles away (in the UK) and had a questionable service record despite its low 4600 miles. The seller at the time was unwilling (due to the distance) to bring the car to ML for and inspection, and my own travel time did not permit for a visit to see it. Both cars had certain limitations, including the premium prices demanded by both sellers, so I stuck to my guns, to hold out for perfection and walked away from both.
My anxieties for a fun car began to get the better of me though and so I turned my sights back (temporarily) to the E30 M3, were I was repeatedly beat to purchase or outbid on several cars in the U.S. Eventually I decided to buy a 1987 E30 325is to turn into a weekend/track vehicle. It had all the original VIN stickers, looked pretty clean and was ready to be worked on. Purchasing that car and getting it ‘track ready’ turned into quite a fun project and now hobby. I got Eibach springs, Koni shocks, Ground Control rear shock mounts, a Sparco front street bar, a butt strut, E30 M3 lower control arms, 4.10 LSD and a custom burned chip. With the help of local mechanic and friend Bruce Beyer the car was ready to run.
In the end as most hobbies go, I had spent more money on the sum of these parts than what the car cost me to begin with. It was Murphy’s Law that not much later I will find (and purchase) a locally owned high mileage 1988 E30 M3. While it was only owned by one family, it was fairly neglected certainly no comparison to my previous M and would not live up to my expectations. I gave it some much needed TLC and posted it on several sites (Roadfly.com, Turnermotorsport classifieds, and the now defunct E30.net board.) for sale. It sold a couple months later to the first person to see it, Andy Sites in San Diego who will enjoy driving it on the street and at track events. Though sad to see it go, it was much needed cash for my next purchase.
The goal
I’d like to think good things come to those who wait, and for me it was happening. Around the same time that I purchased and subsequently sold the black M3, I came across an ad from a seller in Germany a Nogaro Silver E30 M3 Cabrio with Black leather, full service history and you guessed it; Air Conditioning! I emailed the seller and he sent me some digital photos confirming it was a dream come true. I almost didn’t know what to do, in the sense that this was it… now I’d have to make this all happen.
I negotiated a price with the seller Bob Van Nort. The process took almost six months from first contact to an actual agreement (he was asking a pretty heavy premium well above the average selling price for others on the market). Getting closer and closer to sealing the deal, faxing the letter of intent to Bob was a true Adrenaline rush! With most of the financing in place the final piece was in place when we sold my wife’s 1998 SLK230. It was wonderful gesture on her part to offer to sell her beautiful daily driver so that I could obtain my goal (she insisted that we take on no debt to pay for the new car). I’m so grateful for that, that she has nominated herself for the Wife’s Hall of Fame, and I completely agree.
The timing of the money transfer could not have occurred at a less opportune time for purchasing Euros. The dollar was at a low and Euros were trading at near parity with the US dollar (Just my luck) and the car actually cost even more in US dollar based on the less than favorable exchange rate my local bank offered. Were it not for Bob and his professional and courteous approach to our deal, it could’ve turned into nothing more than an expensive headache. We stayed in contact throughout sharing information back and forth. Bob even agreed to pick up another mechanic friend of mine, Jake Larsen at an airport two hours from his home for a pre-purchase inspection. Jake and I met during the 2001 summer trip to Independent Motors. He drove my wife and I around to see a number of BMW’s on the market at the time. (We met via the BMW Car Club SIG List, which was the beginning of what has now become a great friendship.) Jake who is stationed with the Air Force in the UK, offered to inspect the car for me (he is a helicopter mechanic by trade, and in the process of restoring his own E30 M3). I had full confidence that he would give me an honest and thorough report. I provided the plane ticket, Bob helped with local logistics and Jake provided an inspection that exceeded my expectations!
The Final Steps…
The next steps were to arrange for shipping, final money transfers, and to find a reputable registered importer that could federalize the car. Bob helped on his end by agreeing to deliver the car to the port in Bremerhaven, Germany for exportation. I chose JK Technologies in Baltimore as my Independent Commercial Importer (ICI) / Registered Importer (RI). After a lot of research JK became the natural choice. Not only did they receive many positive recommendations from other sources who were familiar with the complexities of importing cars into the U.S. from Europe, but they also had the specific experience, having imported the first E30 M3 Cabrio into the U.S. It was JK Technologies that referred me to EH Harms that I contracted to handle the logistics of shipping.
Unfortunately for me (and in no part the fault of my importer), JK Technologies was completely back logged with federalizing Ferraris (see the article on the petition filed by Ferrari with DOT, in the links below), which caused my car to sit in the storage facility for a number of months before they could officially start the federalization process. It’s worth noting (and if you read the articles you’ll see) this backlog not only effected JK Technologies, but all importers. I’ve since found out there are importers that haven’t been able to clear cars in over 2 years. I consider myself very lucky because JK is currently the only importer (along with some of their customers) that is fighting on behalf of their customer to get their cars through this process (see Washington Post articles below).
The process of importing a vehicle normally takes an average of 90-120 days, and then USEPA and USDOT have 15 and 30 business day inspection periods (respectively).
I did finally get to see the car nearly two months after it arrived in the US on Nov 4th. However, the car still sits in Baltimore at JK Technologies awaiting to completion of the federalization process.
Stay tuned for further updates!

